
 Facebook
 Whatsapp
 LinkedIn
 Pinterest
A step-by-step guide to integrate various payment gateways to your shopify store.
Now selling online is hassle-free with multiple payment options available for your Shopify stores. Accept payments to your bank accounts with seamless integration of various payment gateways by following this step-by-step guide.
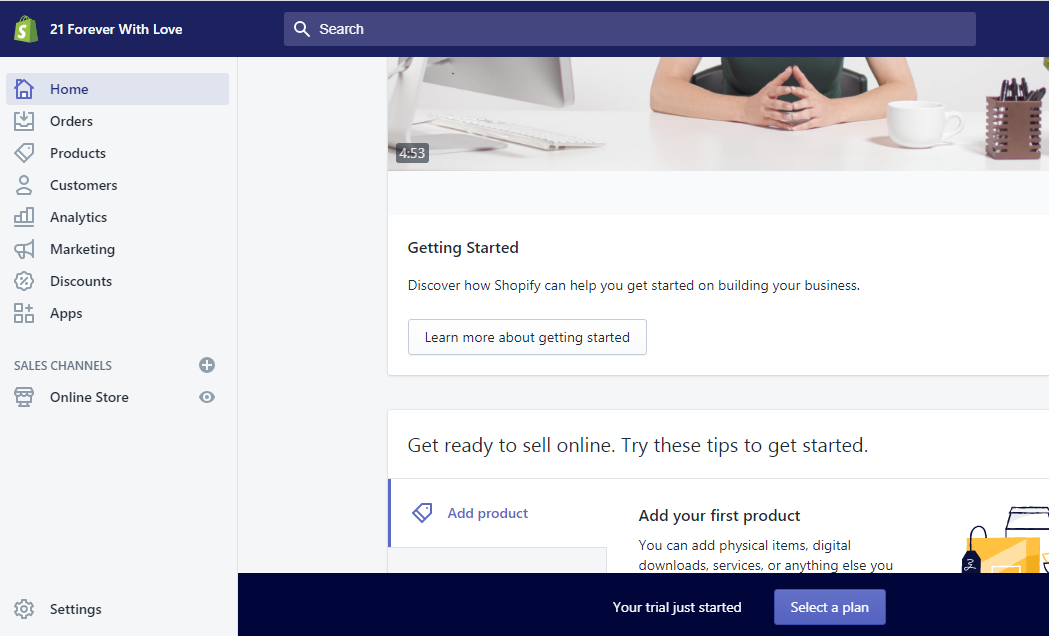
Step 1: Log in to your Shopify Stores. After logging, click on ‘Settings’ which is on the lower left-hand side of the page.
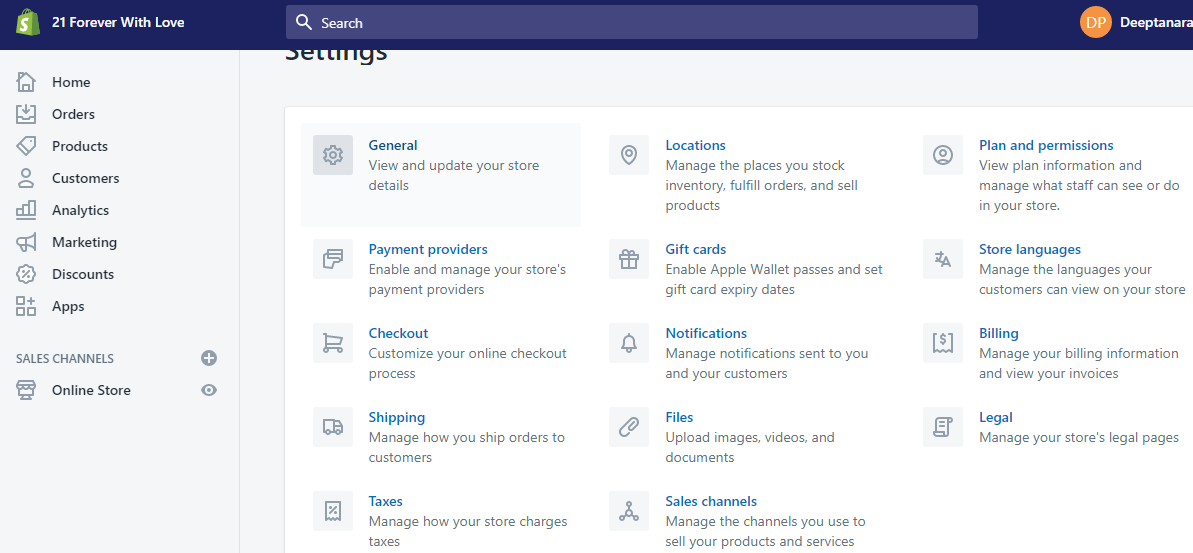
Step 2: Click on Settings. In Settings, click on ‘Payment Providers.’
Step 3: After clicking on ‘Payment Providers,’ you will be directed to a page that consists of various payment options like PayPal, third-party payment providers, manual payment options, and so on, to integrate into your Shopify store. Scroll down to ‘Payment Capture’ before going to any other option.
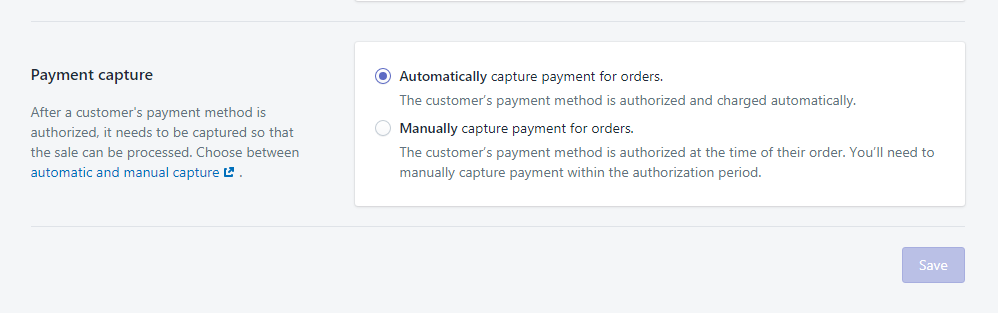
As shown in the screenshot above, there are two options under the Payment Capture section- ‘Automatically and Manually. It is always recommended to select ‘Automatically’ over ‘Manually’ because Manually capturing payments is possible and suitable when you are a wholesaler and have to wait for a certain period of time for the payments. With ‘Automatically,’ as soon as the order comes in the payment gets captured. Automatically capturing payments avoids fraudulent charges. Moreover, if you are waiting for a longer period for payments, there are possibilities that you may lose money and may come across some fraud orders.
Step 4: Scroll up and go to PayPal Express Checkout. Select ‘Activate PayPal Express Checkout.’
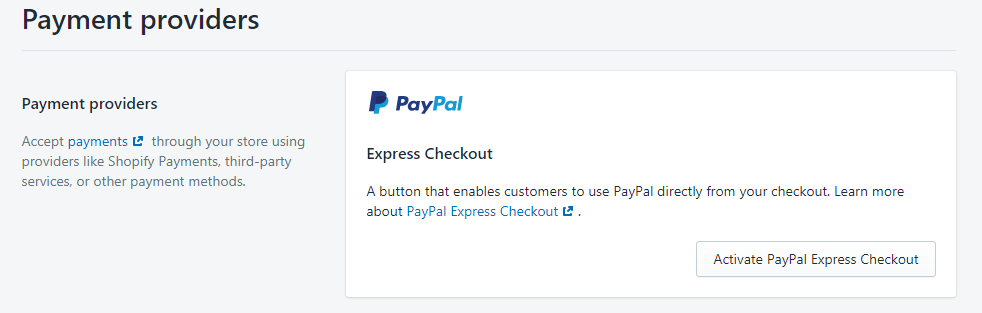
After clicking on PayPal Express Checkout, you will be directed to the PayPal official website. If you have a PayPal account, directly log in. If you don’t have an account, sign up for the same. You have to provide your personal information, bank account details, and so on for activating the PayPal account.
Step 5: Check the 2nd area of payment ‘Third-party providers.’ If you already have a payment gateway, this is suitable for you. Click on ‘Choose third-party Provider.’

After clicking on the ‘Choose third-party provider,’ you will be directed to a page where you get a list of all third-party payment providers. For example, you have already ‘2Checkout’ payment provider. Select from the list as displayed.
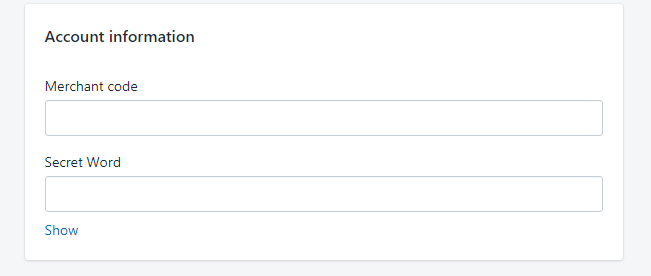
After selecting ‘2Checkout,’ you will be given instruction regarding setting up an account for 2Checkout and activate it. While setting up the account, you will get a merchant code that you need to copy and paste in the ‘Merchant Code’ field. Also, generate a new INS secret word and paste this in the ‘Secret Word’ field. Finally, click on the save settings. The first section after selecting ‘2Checkout’ will appear with a set of instructions as shown below:

The second section is where you have to copy the generated merchant code and secret code.
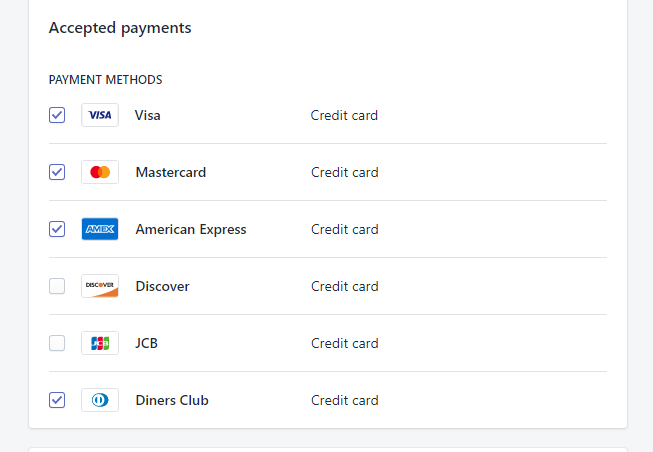
The third section includes the various credit card payments that you are going to accept. Select the ones you want to accept and unselect the rest of the options. For example, if you want to accept only Visa, Mastercard, American Express, and Diners Club credit cards, select those options.
The last section includes ‘Test Mode.’ In this section, your selected payment gateway’s working, whether the setup is right by simulating failed and successful transactions is checked. Select the checkbox if you want to test the payment gateway. Since we have selected 2Checkout, the display is as follows:
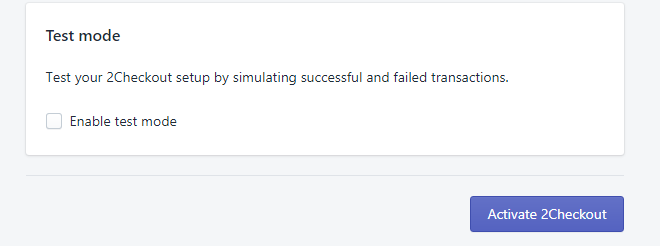
Click on ‘Activate 2Checkout.’
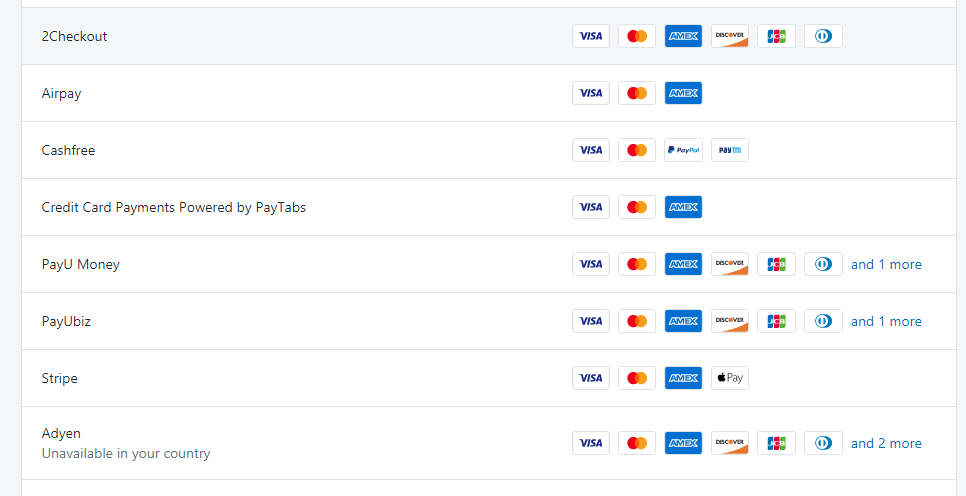
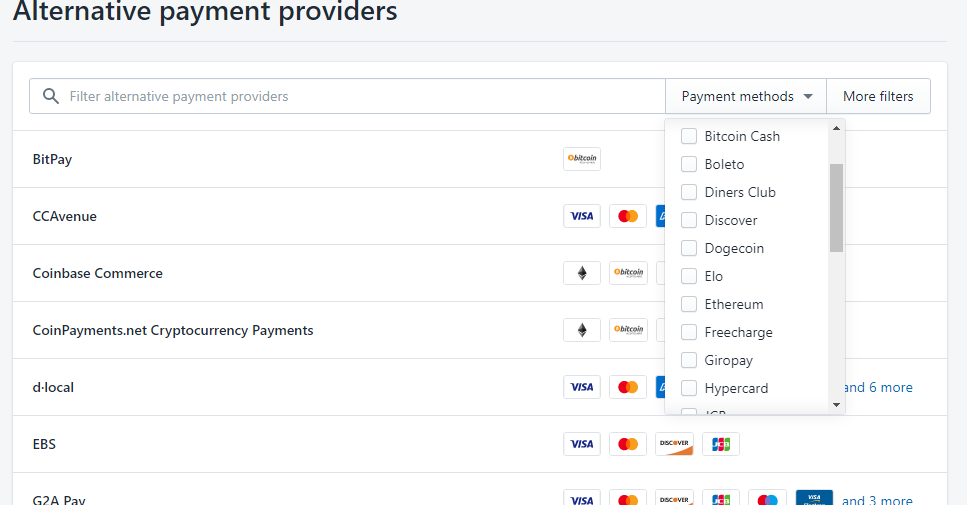
Step 6: The third area of payment is ‘Alternative Payment Methods.’ Click on ‘Choose Alternative payment.’ You will get many alternative payment options as shown below. If any of the payment options aren’t available for your country, it will be displayed below the payment provider.
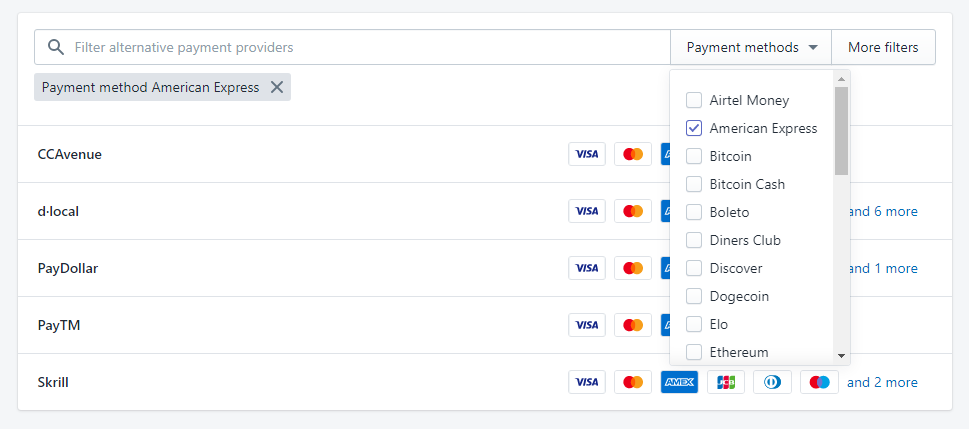
If you see the list displayed on the left, it shows the payment providers and the drop down is all about payment methods. Now if you select a particular payment method, say, American Express, then the list to the left will change and display only those providers who support payments through American Express. This is shown in the screenshot below:
Once you select the payment methods and a suitable payment provider, you will be directed to a page that consists of the ‘Account information’ and ‘Accepted payment methods.’ Here, we will talk about CCAvenue as we are considering in our example. Under the Account Information section, you will find two fields- Access Code & Working Key. If you have CCAvenue’s account, you can directly login or you have to create it. To get your Access code and working key, Open settings menu→ Select API Keys→ Copy Access code and Working key.
Under the ‘Accepted Information Section,’ select the payment methods that you want to accept and click on the Activate button.
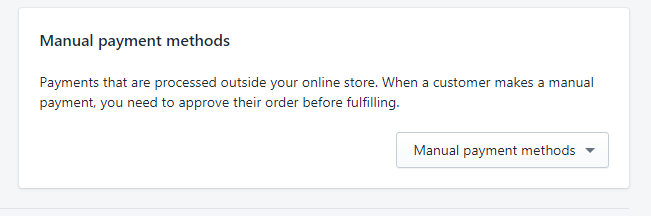
Step 7: The last section comprises of ‘Manual Payment Methods.’ In this section, you can add payment methods like Cash on Delivery(COD), account transfer, money order, and so on. Click on ‘Manual Payment Methods’ and check the options available in the dropdown and select the suitable ones. For example, COD. Also, you have the option to create a custom payment method suitable for your business.
Step 8: Another important area is ‘Shopify Payments.’ If you are setting up your store in India, then Shopify payments will not be available to you. It is available to certain countries like the USA, UK, Australia, Canada, Denmark, Germany, Hong Kong SAR China, Italy, Ireland, Japan, The Netherlands, New Zealand, Singapore, Sweden, and Switzerland.
Once you set up your online store in Shopify, if you are in countries other than the above mentioned, the Shopify Payment option won’t appear.
To integrate Shopify Payments,
- Activate Shopify payments from the Payment providers page as you have activated other payments. Click on Add provider.
- To set up Shopify Payments you will require:
- Employer Identification Number
- Banking information
- The average price of the orders.
- The average time to ship.
- You have two options-Shopify Payments and Third-Party credit card provider. Select which credit cards you would like to accept for your online store if you are selecting the Third-party credit card option.
- Select Shopify Payments as it is recommended for Shopify stores. Once selected, press continue, and it will be directed on the previous page.
- You will get an option in the Shopify Payment section ‘Complete Account setup.’ Once you click on this option, you will be directed to a page where you need to feed all the information mentioned in 2nd point.
Once all the relevant information is fed in the fields, you are ready to accept payments with Shopify payments on your online store.
In a nutshell
These steps will help you to integrate payment options to your Shopify store easily. Try them out. If you have any kind of query you may let us know. How about a quick chat or a call?
You can also take the help of any Shopify development company to help you out to select the best payment gateway for your e-store.
Author Bio


 Start Chat